Keeping your car looking sleek and well-maintained often comes down to the condition of its paint. Whether it’s a small scratch from a shopping cart, fading from years under the sun, or peeling clear coat, imperfections can make a vehicle appear older than it really is. While many car owners rush to professional auto body shops for paint repairs, the truth is that many of these fixes can be done right at home with the right tools, preparation, and patience.
DIY car paint repair is not just a cost-effective solution—it also gives you the satisfaction of restoring your vehicle’s appearance on your own terms. This guide will walk you through the entire process: from preparing the surface, applying paint correctly, and finishing with protective measures that keep your car looking its best for years to come.
Why Consider DIY Car Paint Repair?
DIY car paint repair has become increasingly popular among car owners who want to save money while still keeping their vehicles in good condition. Professional auto body shops often charge hundreds or even thousands of dollars for services that can be done at home with some dedication and the right products. But beyond cost savings, there are other compelling reasons to consider a do-it-yourself approach.
First, minor paint repairs such as touch-ups or small area repaints don’t always require specialized equipment. Many car paint repair kits are designed specifically for beginners and include everything you need. Second, learning to do these repairs yourself helps you respond quickly to damage—whether it’s a new scratch, chip, or rust spot—before it spreads and becomes a bigger problem. Finally, DIY car paint repair offers a sense of control and customization. You can choose when, where, and how to address the damage, tailoring the results to your expectations.
What Tools and Materials Do You Need?
Before you dive into any DIY car paint repair project, it’s essential to gather the right tools and materials. Having everything on hand ensures you won’t have to pause midway through, which could compromise your results.
Here’s a list of essentials you’ll need:
- Sandpaper: Various grits (400 to 2000) for smoothing scratches and prepping surfaces.
- Masking tape and plastic sheets: To protect areas that don’t need painting.
- Primer: Creates a proper surface for paint to adhere to.
- Touch-up paint or spray paint: Make sure it matches your car’s factory color code.
- Clear coat: Protects the paint and gives it a glossy finish.
- Rubbing compound and polishing pads: To smooth out imperfections after painting.
- Microfiber cloths: For cleaning and polishing.
- Respirator mask and gloves: Safety gear to protect you from fumes and chemicals.
While some items can be purchased individually, car paint repair kits often bundle the basics together, which can be a more convenient option for beginners.
How to Prep Your Vehicle Before Painting
Proper preparation is the most important part of DIY car paint repair. Without it, even the highest-quality paint won’t adhere properly, and your repair may end up looking uneven or short-lived. This step can feel time-consuming, but it’s worth every minute.
Step 1: Clean the Area Thoroughly
Start by washing the car with soap and water, focusing on the damaged area. Dirt, grease, and road grime can interfere with adhesion. Dry the surface completely with a microfiber cloth.
Step 2: Sand the Damaged Area
Use fine-grit sandpaper (600 to 800 grit) to smooth out scratches or remove any peeling paint. For deeper scratches or rust spots, you may need to use coarser sandpaper first, then gradually move to finer grits. The goal is to create a smooth surface for painting.
Step 3: Mask Surrounding Areas
Use masking tape and plastic sheets to cover parts of the car that you don’t want to paint. This includes windows, trim, and nearby panels. Precision here ensures a cleaner finish.
Step 4: Apply Primer
If the bare metal is exposed after sanding, applying a primer is essential. Primer not only ensures better paint adhesion but also prevents rust. Allow the primer to dry completely before moving on.
By carefully prepping your car, you’re laying the foundation for a repair that blends seamlessly with the existing paint.
Applying Paint: Step-by-Step Guide
Once the surface is prepped, it’s time for the most exciting part—applying the paint. This stage requires patience, precision, and a steady hand to ensure a professional-looking finish.
Step 1: Choose the Right Paint
Every car has a factory paint code, usually found inside the driver’s side door or under the hood. Use this code to purchase the exact match for your vehicle. Mismatched paint can make even the best DIY repair look unprofessional.
Step 2: Test Before Applying
Before painting the car, test the spray or brush on a piece of cardboard. This allows you to practice the technique and check the color match.
Step 3: Apply Thin, Even Coats
Spray or brush the paint in thin, even layers rather than one heavy coat. Multiple light coats reduce the risk of drips and uneven coverage. Let each coat dry before applying the next—usually about 10 to 15 minutes.
Step 4: Blend with Existing Paint
Feather the edges of the repair into the surrounding paint to create a seamless transition. This blending step makes the repair less noticeable.
Step 5: Let It Cure
Once you’ve applied enough coats (usually 2–3), let the paint dry thoroughly. Depending on temperature and humidity, this could take several hours to a full day.
Patience is key. Rushing through the paint application often leads to imperfections that are difficult to fix later.
Finishing Touches: Applying Clear Coat and Polishing
Painting is only half the process. To protect your repair and restore the car’s glossy finish, you’ll need to apply a clear coat and polish the area.
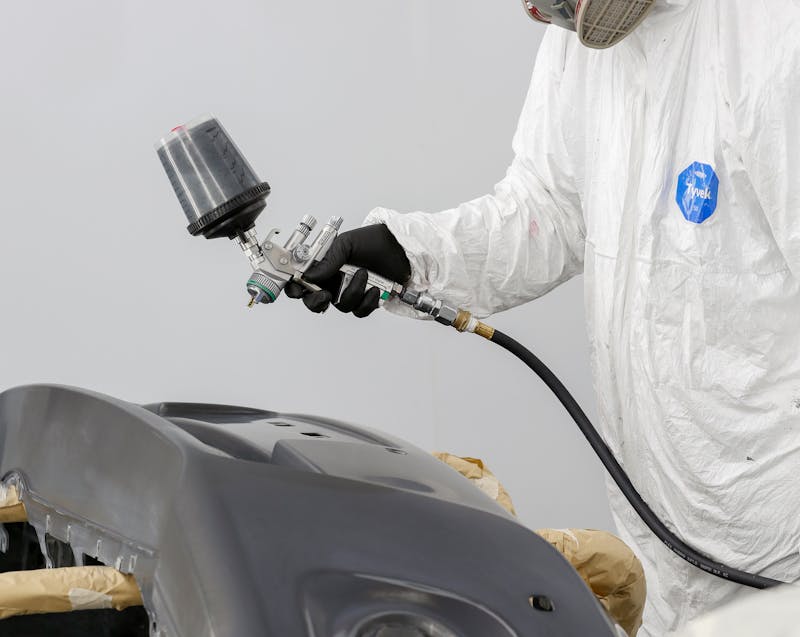
Step 1: Apply Clear Coat
Spray the clear coat in light, even layers over the painted area. This not only adds shine but also seals the paint, protecting it from UV rays and moisture. Apply two to three coats, allowing each to dry before the next.
Step 2: Wet Sand for Smoothness
Once the clear coat is dry, use very fine sandpaper (1500 to 2000 grit) with water to lightly sand the area. This step removes small imperfections and creates a smoother surface.
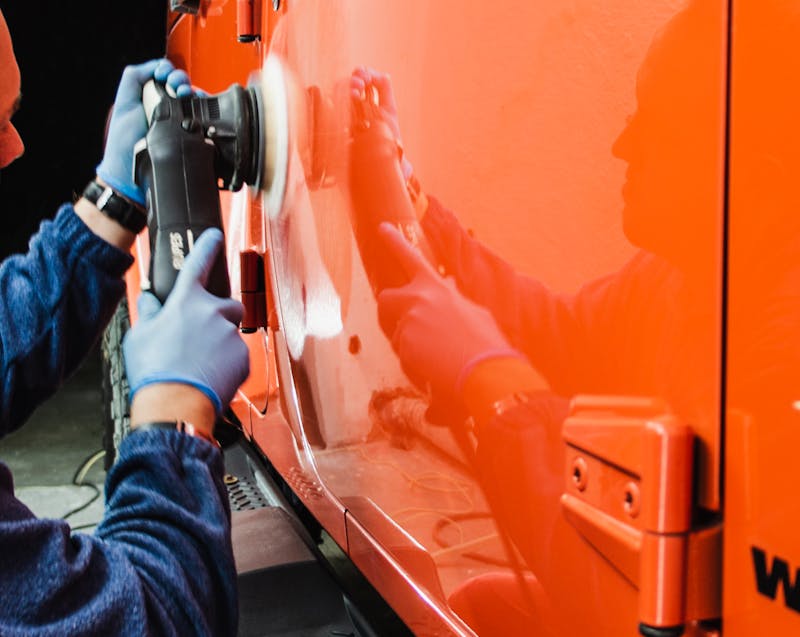
Step 3: Polish the Area
Apply rubbing compound with a microfiber cloth or polishing pad, then buff the area until it matches the shine of the rest of the car. Follow up with a finer polish for added gloss.
This stage brings everything together, transforming your repair from a visible patch to a seamless finish.
DIY Car Paint Repair Tips and Tricks
Even with clear instructions, DIY car paint repair can be tricky. These tips can help you achieve better results:
- Work in the right environment: Choose a well-ventilated, dust-free area with mild temperatures. Avoid windy or humid conditions.
- Be patient with drying times: Rushing between coats is one of the most common mistakes. Allow proper curing for durability.
- Avoid over-sanding: Too much sanding can create dents or uneven surfaces. Light pressure is key.
- Use high-quality products: Cheaper paints may not match your car’s color accurately or last as long.
- Don’t skip the clear coat: It’s essential for long-term protection and shine.
Following these tips ensures that your efforts pay off with a repair that lasts.
How to Protect Your Car’s Paint After Repair
Once you’ve successfully completed a DIY car paint repair, protecting the finish is critical to keeping your car looking its best. Without protection, the same issues—scratches, fading, or rust—can reappear quickly.
Regular Washing and Waxing
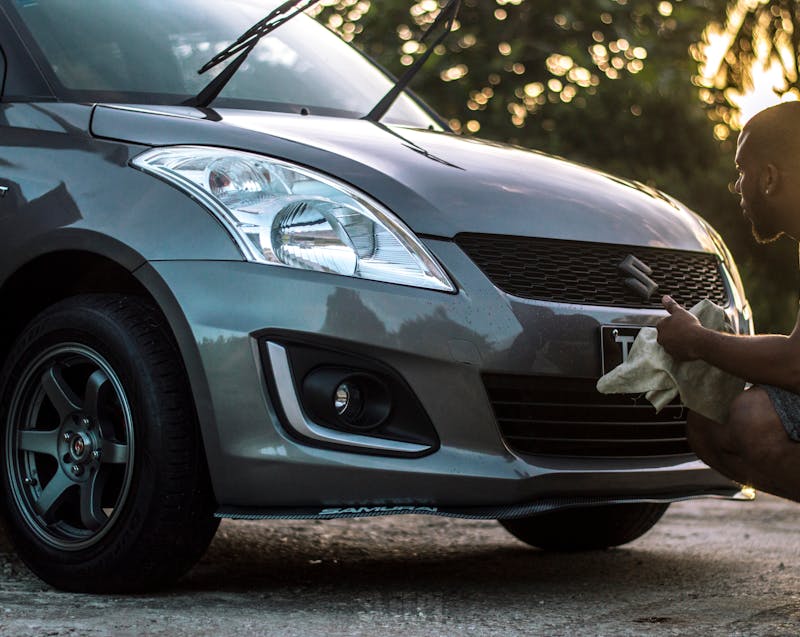
Wash your car every two weeks to remove dirt and contaminants that can damage the paint. Apply wax every two to three months to create a protective barrier against UV rays and moisture.
Park Smart
Whenever possible, park your car in a garage or shaded area. Sun exposure is one of the leading causes of paint fading.
Apply Paint Sealant or Ceramic Coating
Paint sealants and ceramic coatings offer long-lasting protection that outperforms regular wax. While ceramic coatings require more effort to apply, they can protect your paint for years.
Fix Chips and Scratches Promptly
Even after a successful repair, new chips and scratches are inevitable. Address them quickly with touch-up paint to prevent rust and spreading damage.
By maintaining your car’s finish, you’ll extend the lifespan of your DIY repair and keep your vehicle looking newer for longer.
Common Mistakes to Avoid in DIY Car Paint Repair
While DIY car paint repair is manageable for most car owners, it’s easy to make mistakes that can ruin the finish or create more work later. Here are some pitfalls to watch out for:
- Skipping prep work: Poor preparation leads to poor results. Always clean and sand properly before painting.
- Using the wrong paint: An incorrect color code or cheap generic paint will stand out.
- Painting in bad conditions: Dust, humidity, or extreme temperatures can ruin paint adhesion.
- Applying too much paint at once: Thick layers lead to runs and uneven surfaces.
- Neglecting safety gear: Paint fumes are harmful—always use a respirator and gloves.
Avoiding these mistakes ensures a smoother process and a professional-quality outcome.
Is DIY Car Paint Repair Right for You?
Not every repair is suitable for a do-it-yourself approach. While small scratches, chips, and localized damage can be handled at home, large-scale paint jobs or structural damage should be left to professionals.
DIY car paint repair is best for:
- Minor scratches or chips
- Peeling the clear coat in small areas
- Rust spots caught early
- Owners willing to invest time and patience
If you’re facing severe damage or need a full-body repaint, a professional service may be worth the investment for long-lasting results.
Conclusion
DIY car paint repair is a rewarding way to restore your vehicle’s appearance without breaking the bank. With the right tools, preparation, and techniques, you can successfully tackle minor paint issues and protect your car’s finish for years to come.
By carefully prepping the surface, applying paint in thin coats, and finishing with clear coat and polishing, your repair can look nearly indistinguishable from professional work. Combine this with proper maintenance and protective measures, and you’ll not only save money but also keep your car looking sharp for the long haul.
Whether you’re fixing a small scratch or addressing a patch of peeling paint, the key is patience and attention to detail. With practice, DIY car paint repair can become an essential skill in your car care toolkit.